
How to Dremel a Dog's Nails
How to Grind/Dremel Dogs Nails
Purpose: To inform interested clients about the benefits of using a grinder with a diamond bit in place of or in addition to traditional nail trimmers.
Part 1: The Basics of a Nail Trim
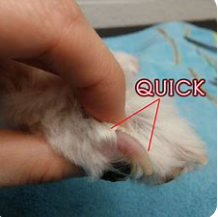
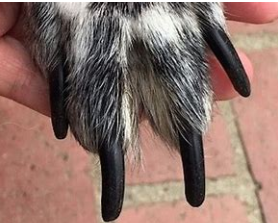
One of the basic needs of a pet is a nail trim on a regular schedule. Traditionally, nails are trimmed with a set of manual clippers as seen in Figure 1. With this method, there is a greater chance of clipping into the cuticle (quick) causing the nail to bleed. Black dog nails are typically harder to clip successfully due to two factors. With black nails, one cannot see the cuticle resulting in bleeding, see Figure 2. And, black nails are typically harder than non-black nails. Figure 3 illustrates the non-black nail is much easier to see the beginning of the quick of the nail and the part of the nail that can be successfully clipped with no blood loss. The quick is the terminal blood supply to the toe.
Figure 1.
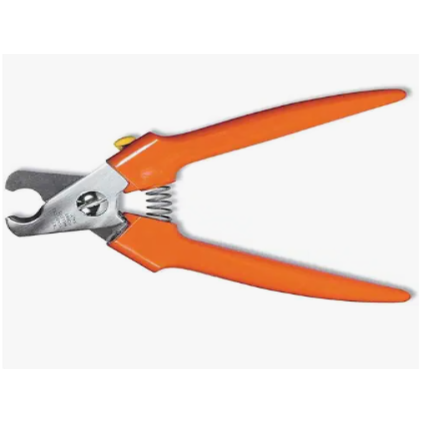
Figure 2.
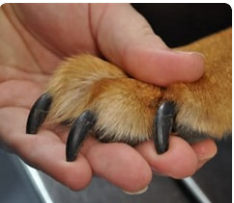
Figure 3.
Without regular nail trimming, the nails will grow out so much that the quick with grow as well, which will cause difficulty with trims. Also, there is always a risk of breaking a nail that could result in the removal of the entire nail. See Figures 4-6.
Figure 4.
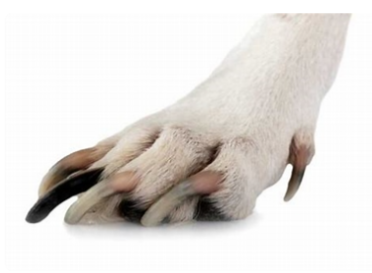
Figure 5.
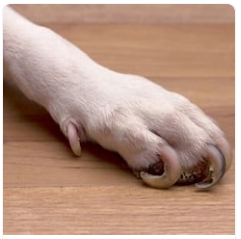
Figure 6.
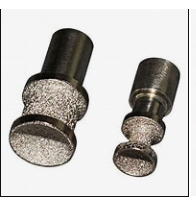
There is an alternative to the manual clipper method. Using a grinding tool with a diamond bit as illustrated below. There are many options for grinders. The best situation is to use a rechargeable battery (wireless) grinder. Commonly, we say “Nail Dremel” when actually it is a nail grinder. Dremel is a brand name. A Dremel as seen in Figure 7 is a popular style. Notice the recharger for the battery. They are sold as a set. In the set there is As for the diamond bit, it has to be purchased separately. The cost ranges from $10 to $70 depending on the degree of cutting surface and style. Figure 8 shows a plain diamond bit that will work just fine for a typical household/kennels and veterinary clinic services. Figure 9 shows a bit with more grinding surface that would be appropriate for professional settings like groomers, trainers, and breeders. Each type will last a very long time.
Figure 7.
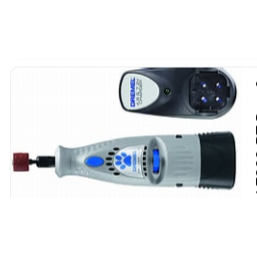
Figure 8.
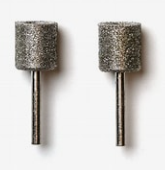
Figure 9.
Part 2: Points to Remember About Your Pet’s Nails
- See Figure 10. How To Trim Dog’s Nails.
- All nails have a cuticle (quick) no matter the nail color.
- Start with a puppy or a new dog as soon as possible.
- Always handle/rub paws without trimming nails to desensitize the area.
- If using a manual trimmer, be cautious of the amount of nail and the angle at which the nail is being removed.
- If your dog has long cuticles, you will need to trim or grind the nail more frequently which will result in the cuticle receding from the nail body.
- Using the grinder more frequently will allow the nail to be shortened more than with the manual trimmer.
- It may be beneficial to use manual trimmers prior to the grinder – if nails are excessively long. Review Figures 4, 5, and 6 as examples.
- Figures 11, 12, and 13 illustrate different sets of nails as visuals.
- Until pet gets accustomed to having nails trimmed, it is wise to have another person assist to secure the pet. If the pet tries to bite, be prepared and have a muzzle on hand.
- If you have more than one dog, keep them separated during nail trims to prevent any dominance activity to the dog you are trimming.
- “How to” videos to demonstrate how to clip nails manually and with a grinder are readily available online.
- If you need one–on–one assistance, any of our Veterinary Technicians will be glad to assist you. Just give us a call.
Figure 10. How to Trim a Dog’s or Cat's Nails
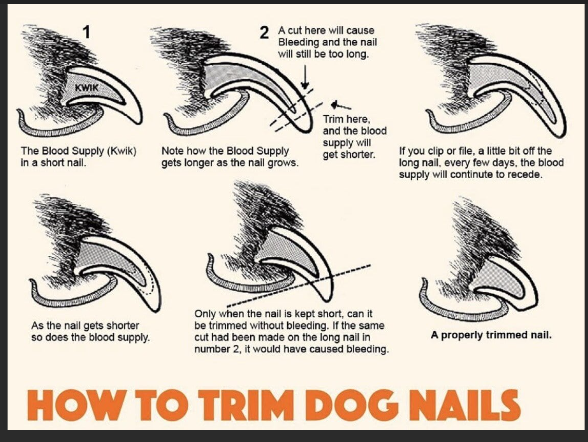
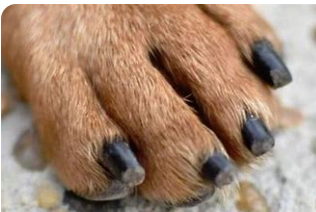
Figure 11. Nails That Need to be Trimmed
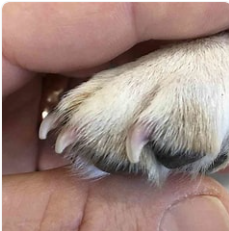
Figure 12. Nails Too Long as compared to Nails the proper length
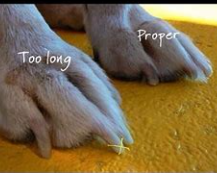
Figure 13. Example of shortened nails with grinder. (shorter than with manual trimmer)
Part 3: How to Grind a Dog’s Nails
With all needed tools collected, set up the area to be used. The steps outlined below describe how you can get started grinding your dog’s nails.
- With assistance from a confident helper, Turn on the grinder to the middle setting and hold for just a minute for the dog to adjust to the sound.
- Secure hold the dog’s paw as you would to clip the nails.
Figure 14. Proper way to hold a paw for grinding.
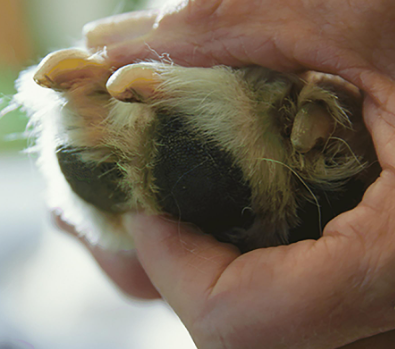
- With deliberate, confident pressure, allow the grinder to round the nail on each toe, then move to the next toe.
- Once the paw is complete, move to the next and follow the same process. For most dogs, starting with the rear paws sets up the dog for success.
- When you complete the rear paws, evaluate the results and determine if more of each nail needs to be removed. Follow the same process for the front paws.
- If you feel the bit and it is HOT, turn the grinder off and let it cool before continuing the process.
Figure 15. Example of grinding a dog’s rear paw.
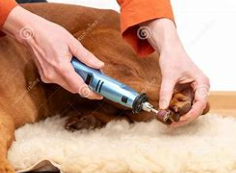
Figure 16. Example of a very successful nail grinding.
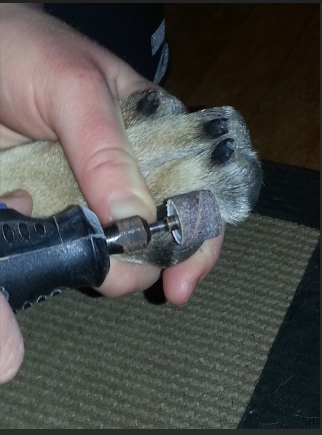
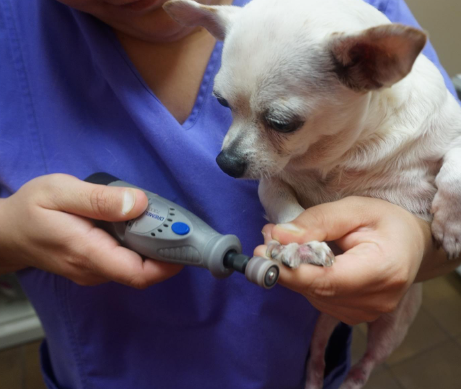
Figure 17. For small dogs, grinding nails can be a one-person job.
As always, let us know if we can help you.
Sources.
Figure 1. www.amazon.com
Figure 2. www.dogfrolics.com
Figure 3. www.kingnikita.com
Figure 4. www.animalia-life.club
Figure 5. www.greatpetcare.com
Figure 6. www.dogster.com
Figure 7. www.amazon.com
Figure 8. www.amazon.com
Figure 9. www.amazon.com
Figure 10. www.thegoldenclub.com
Figure 11. www.walkervillevet.com.au
Figure 12. www.scottsdalepethotel.com
Figure 13. www.youdidwhatwithyourweiner.com
Figure 14. www.dremel.com
Figure 15. www.cartoondealer.com
Figure 16. www.trurovet.com
Figure 17. www.Northendveterinaryclinic.com